요약
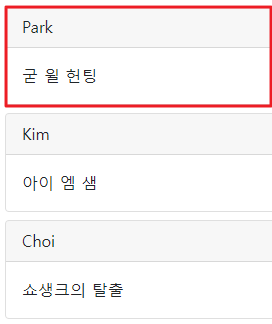
댓글을 위해 show.mustache 파일 하단에 {{>comments/_comments}} 파일을 삽입 하였다. 해당 _comments 파일을 댓글 목록을 보여주는 부분과 새 댓글을 작성하는 부분으로 나누어져 있다. _list.mustache 파일로 들어가서 보면 {{#commentsDtos}} {{/commentsDtos}} 파일 안의 내용을 반복하여 실행하고 있다. 여기에는 {{nickname}}과 {{body}}가 담겨 있는데 그 내용은 아래와 같이 출력되는 것을 볼 수 있다.
# 댓글 목록 뷰 페이지를 만들고, 이를 게시글 상세 페이지에서 확인 한다.
일단 이전의 생성된 상세 페이지를 확인 한다.
서버를 구동 시키고 localhost:8080/articles/5 로 접근을 하면 아래와 같은 상세 페이지 화면을 볼 수 있다.
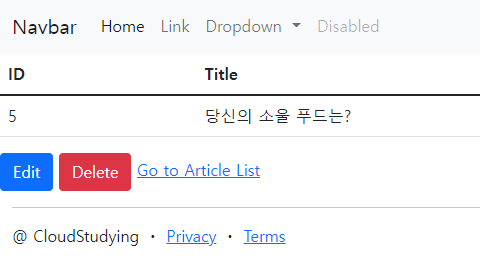
해당 상세 페이지 아래 부분에 댓글 목록을 확인하는 뷰 페이지를 삽입 한다.
해당 페이지를 보여주는 컨트롤러 부터 확인한다.
ArticleController의 show 라는 메소드가 해당 URL로 접근을 했을때 처리하는 메소드 이다.
ArticleController 파일에서 파일 상단에 아래와 같이 CommentService를 사용할 수 있도록 등록해 준다.
@Autowired
private CommentService commentService;
해당 서비스 정보를 잘 받아왔다고 가정하고, 뷰페이지에서 해당 내용을 사용할 수 있도록 모델에 등록을 해준다.
서비스에서 데이터를 받아온다. → List<CommentDto> commentDtos = commentService.comments(id);
뷰 페이지에서 사용할 수 있도록 모델에 등록해 준다. → model.addAttribute("commentDtos", commentDtos);
    @GetMapping("articles/{id}")
    public String show(@PathVariable Long id, Model model) {
        log.info("id =" + id);

//        1. id로 데이터를 가져온다.
        Article articleEntity = articleRepository.findById(id).orElse(null);
        List<CommentDto> commentDtos = commentService.comments(id);

//        2. 가져온 데이터를 모델에 등록한다.
        model.addAttribute("article", articleEntity);
        model.addAttribute("commentDtos", commentDtos);
//        3. 보여줄 페이지를 설정한다.
        return "articles/show";
    }
그렇다면 반환하는 파일인 show.mustache 파일을 찾아서 수정을 해주면 된다.
해당 show.mustache 파일은 resources → Templates → articles 폴더 안에 show.mustache 파일을 찾아서 수정해 준다.
해당 페이지의 맨 마지막 부분에 댓글 목록을 확인하는 내용을 넣을 것이므로, show.mustache 파일의 가장 아래부분에 내용을 추가한다. mustache 파일을 삽입하는 형태로 작성을 한다. 추가 내용 : {{>comments/_comments}}
해당 파일을 생성한다. Templates → comments(폴더를 생성) → comments.mustache 파일을 생성한다.
show.mustache 전체 코드
{{>layouts/header}}

<table class="table">
    <thead>
    <tr>
        <th scope="col">ID</th>
        <th scope="col">Title</th>
        <th scope="col">Content</th>
    </tr>
    </thead>
    <tbody>
    {{#article}}
        <tr>
            <td>{{id}}</td>
            <td>{{title}}</td>
            <td>{{content}}</td>
        </tr>
    {{/article}}
    </tbody>
</table>

<a href="/articles/{{article.id}}/edit" class="btn btn-primary">Edit</a>
<a href="/articles/{{article.id}}/delete" class="btn btn-danger">Delete</a>
<a href="/articles">Go to Article List</a>

{{>comments/_comments}}

{{>layouts/footer}}
comments.mustache 전체 코드
<div>
    <!-- 댓글 목록 -->
    {{>comments/_list}}

    <!-- 새 댓글 작성 -->
    {{>comments/_new}}
</div>
_list.mustache 전체 코드
mustache 문법을 보면 {{#}}{{/}}안에 내용을 반복한다는 mustache 문법이다.
{{id}} 값은 commnetDtos에서 값을 받아와서 표시하게 된다.
"card-header"와 "card-body"는 부트스트랩에서 제공하는 기능이라고 할 수 있다. 해당 기능은 부트스트랩 사이트의 doc에서 검색하여 찾을 수 있다.
<div id="comments-list">
    {{#commentDtos}}
        <div class="card m-2" id="comments-{{id}}">
            <div class="card-header">
                {{nickname}}
            </div>
            <div class="card-body">
                {{body}}
            </div>
        </div>
    {{/commentDtos}}
</div>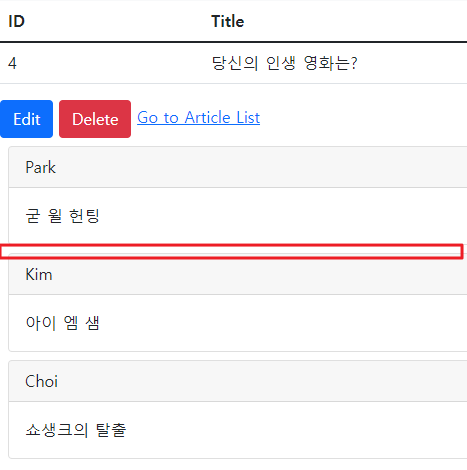
_new.mustache 파일은 아직 작성 하지 않았으므로 내용없이 파일만 생성한다.
현재 까지의 기능을 확인
'⭐ SpringBoot > 𝄜 게시판 with SpringBoot' 카테고리의 다른 글
| 25. 댓글 수정 with 자바스크립트 (0) | 2022.04.08 |
|---|---|
| 24. 댓글 등록 with JavaScript (0) | 2022.04.08 |
| 22. 댓글 CRUD를 위한 Controller와 Service를 생성 (0) | 2022.04.07 |
| 21. 댓글 CRUD를 위한 Entity와 Repository를 생성 (0) | 2022.04.06 |
| 20. 테스트 TDD (0) | 2022.04.06 |

