# 기존 Article 데이터를 CRUD하기 위한 Rest API를 구현한다.
RestAPI
RestAPI의 헤더는 편지봉투 이고, Body는 내용 이라고 볼 수 있다.
RestAPI의 주소 설계
GET : /api/articles
GET : /api/articles/{id}
POST : /api/articles
PATCH : /api/articles/{id}
DELETE : /api/articles/{id}
코드 구현
패키지를 추가한다. Controller 패키지 폴더 레벨에서 api 라는 패키지 폴더를 생성한다.
해당 api 패키지 폴더 안에 클래스를 생성한다. FirstApiController 클래스를 생성한다.
컨트롤러 어노테이션을 @RestController를 입력한다. 일반 템플릿 컨트롤러는 View 템플릿 페이지를 반환 하지만 @RestController는 기본적으로 JSON을 반환 한다.
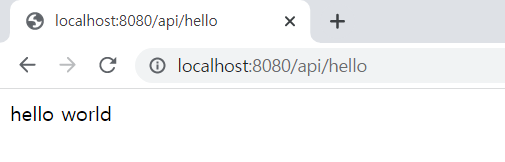
http://localhost:8080/api/hello 를 호출 했을때 해당 페이지에 helloworld 가 출력 되도록 하는 코드는 아래와 같다.
@GetMapping으로 /api/hello 라는 요청이 들어 왔을때, hello world를 반환하는 코드이다.
package com.example.firstproject.api;

import org.springframework.web.bind.annotation.GetMapping;
import org.springframework.web.bind.annotation.RestController;

@RestController // RestAPI용 컨트롤러! JSON을 반환!
public class FirstApiController {

    @GetMapping("/api/hello")
    public String hello() {
        return "hello world";
    }
}
해당 url을 요청하면 아래와 같이 반환되는 값을 볼 수 있다.
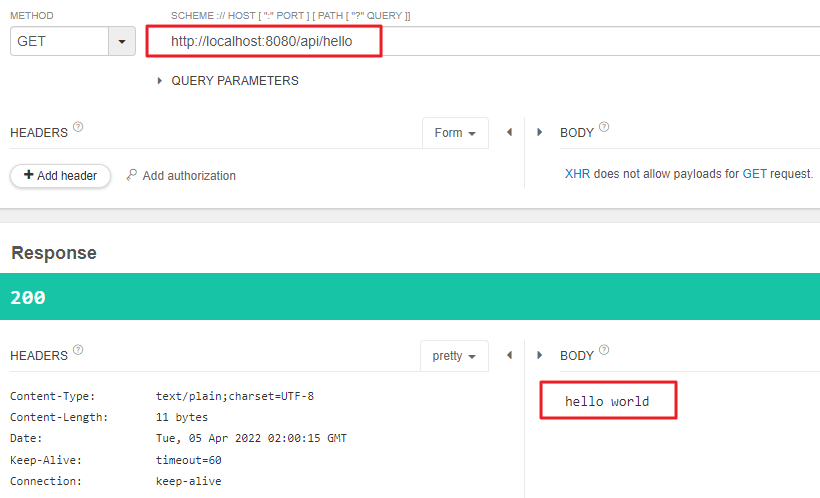
Talend API 를 통해서 테스트
리턴 값으로 helloworld를 받아오는것을 볼 수 있다.
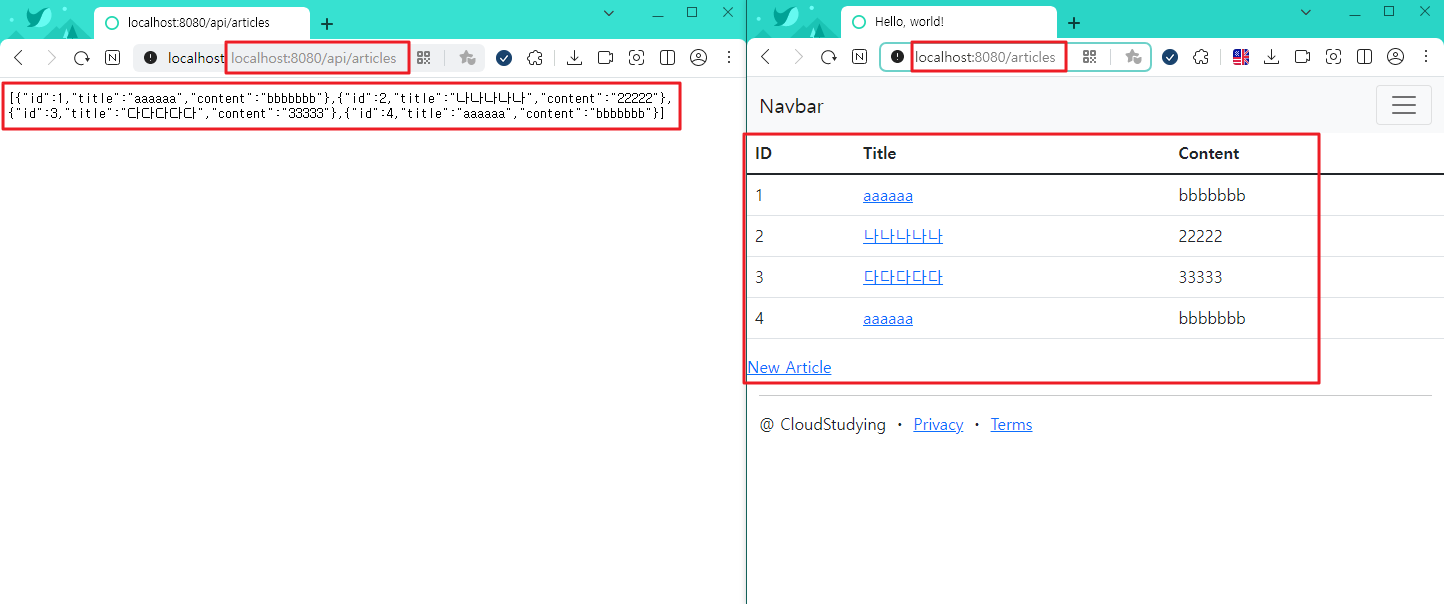
RestController와 일반 Controller의 차이?
일반 Controller는 요청을 보내면 뷰 템플릿 페이지가 반환되는 반면 RestController는 일반적으로 JSON과 텍스트 즉 데이터를 반환한다.
아래의 캡쳐 이미지에서 왼쪽은 RestController를 호출한 값이고, 오른쪽은 일반 Controller를 호출한 값이다.
확연히 차이가 나는것을 볼 수 있다.
RestAPI CRUD 기능을 생성
api 패키지 폴더에 ArticleApiController라는 새로운 클래스 파일을 생성한다.
@RestController 를 설정한다. 그리고 GET, POST, PATCH, DELETE 4가지 요청을 생성한다.
GET 요청
/api/articles 라고 요청 시 모든 데이터를 조회한다.
GetMapping을 통해서 해당 URL의 요청을 받아온다. Article의 리트스를 담아서 반환할 것이므로 List<Article> 이라고 설정 해주고 이름을 index라고 정한다. 해당 메소드를 통해서 모든 article을 리턴한다. return articleRepository.findAll();
List와 Article을 import 해주고, 전역 필드에 private ArticleRepository articleRepository; 를 선언해 준다. 그리고 스프링 부터에서 땡겨 와야 하므로 @Autowired DI를 통해 어노테이션 옵션을 부여한다.
전체 조회가 아닌 단일 id 값을 조회하는 코드 > // 단일 조회 코드
아이디 값을 1,2,3... 이런식으로 가져와야 하니까 "/api/articles/{id}" 값을 넣어준다.
return articleRepository.findById(id)를 통해서 가져 오는데, 값이 없는 경우에는 .orElse(null);을 통해 공백으로 null 값을 가져 오도록 한다.
public Article index(@PathVariable Long id) { : 단일 Article을 반환할 것이기 때문에 Article 타입을 설정 하고, "/api/articles/{id}" 해당 URL 요청을 통해서 id 값을 가져 올때는 @PathVariable Long id을 통해서 값을 가져 온다.
    @GetMapping("/api/articles/{id}")
    public Article index(@PathVariable Long id) {
        return articleRepository.findById(id).orElse(null);
    }
Talend API 사이트 에서 GET 요청을 통해 데이터를 가져오기 테스트
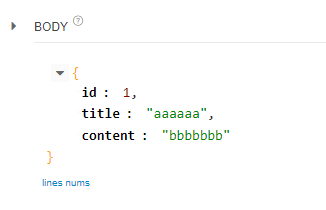
http://localhost:8080/api/articles/1 을 통해 해당 데이터를 GET 요청으로 데이터를 가져와보면 아래와 같이 BODY에 해당 데이터가 표시되는 것을 볼 수 있다.

POST 코드 구현
@PostMapping("/api/articles") 은 POST 형태로 /api/articles을 요청할때 실행 된다.
return articleRepository.save(article); → 클라이언트가 전송한 article을 save 해야한다.
public Article create(@RequestBody ArticleForm dto) { → 위에서 save 한 article 데이터가 없으니, ArticleForm dto로 데이터를 받아와 주면 된다.
Article article = dto.toEntity(); → dto를 Entity로 변환한다. 그리고 article이란 변수로 반환한다. 그래서 반환된 값을 마지막으로 DB로 save해 주면 된다.
해당 코드만을 가지고 POST 값을 Talend에서 Send 하면 BODY 부분에 title과 content가 null 값이 반환이 될 것이다. 왜냐하면 이전에는 Form에서 데이터를 던질때는 (ArticleForm dto) 이처럼 파라미터에 추가만 해주면 됐지만 RestAPI에서 JSON형태로 데이터를 던질 경우에는 @RequestBody 어노테이션을 반드시 입력해 줘야 한다. RequestBody(요청한 BODY 값)에서 해당 데이터를 받아오라는 의미로 해석 된다.
(@RequestBody : JSON 데이터 받기)
    // POST
    @PostMapping("/api/articles")
    public Article create(@RequestBody ArticleForm dto) {
        Article article = dto.toEntity();
        return articleRepository.save(article);
    }
POST 요청
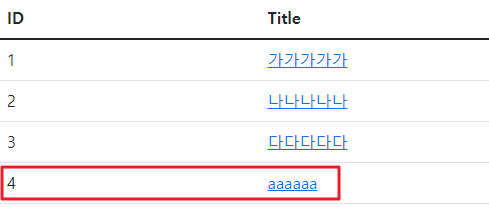
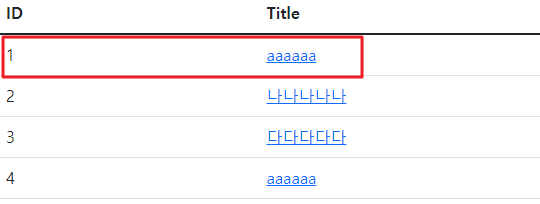
POST 요청은 http://localhost:8080/api/articles 로, 데이터를 입력하면 된다.
{
    "title" : "aaaaaa",
    "content" : "bbbbbbb"
}
해당 코드로 POST 요청을 하면 아래와 같이 4번 라인에 aaaaaa 라는 값이 등록된것을 확인 할 수 있다.
PATCH 코드 구현
요청 URL이 localhost:8080/api/articles/1 이런 형태로 요청을 하기로 했으므로, → @PatchMapping("/api/articles/{id}") 이와 같이 구현을 해준다.
public ResponseEntity<Article> update(@PathVariable Long id, @RequestBody ArticleForm dto) { → 해당 메소드 이름을 update로 변경하고, 추가로 id 값도 받아야 하니 @PathVariable Long id 값도 입력해 준다.
수정 코드 구현 방법
1. 수정용 엔티티를 생성
Article article = dto.toEntity();
수정용 엔티티를 만들려면 dto를 엔티티로 변환한다. 변환된 값을 article 이라는 변수에 저장한다.
* 로그에 변수를 담기
log.info("id: {}", "article: {}", id, article.toString()); → id를 id: {}에 담고, article이 article: {}에 담긴다.
로그가 에러가 나면 @Slf4j를 어노테이션으로 연결해 주면 된다.
2. 대상 엔티티를 조회
articleRepository를 통해서 findById(id)를 통해 id 값을 가져오는데 만약에 이 값이 없다면 null 값을 리턴 해라. 그리고 target 이라는 이름으로 생성한다.
Article target = articleRepository.findById(id).orElse(null);
3. 잘못된 요청 처리
만약에 target이 null 이거나(없는것을 수정해 달라고 한 경우) 또는 id가 URL로 던져진 id값과 dto로 받아온 id값이 다른경우, Response 응답 400번을 return을 해야한다.
일단 리턴을 Article로 하면 안되고 Public ResponseEntity<Article>... 로 담아서 보내줘야 한다.
담아서 보내면 상태코드(200, 400 등등)를 실어서 보낼 수 있다. → return ResponseEntity.status(HttpStatus.BAD_REQUEST).body(null);
만약 잘못된 요청이 아니고 정상적으로 응답을 했다면, 4번의 return 값으로 body에 updated를 실어서 return을 해준다. → return ResponseEntity.status(HttpStatus.OK).body(updated);
        if (target == null || id != article.getId()) {
            // 400, 잘못된 요청 응답!
            log.info("잘못된 요청! id: {}, article: {}", id, article.toString());
            return ResponseEntity.status(HttpStatus.BAD_REQUEST).body(null);
        }
4. 잘못된 요청이 아니라면 업데이트 및 정상 응답
articleRepository를 통해서 위에서 변환된 article을 save 하면 된다. 그리고 이를 updated라는 이름으로 연결해주고 연결된 값(updated)을 리턴해 주면 된다. 만약 3개의 데이터만 있는데 100번째 데이터를 조회 및 요청 id값이 잘못된 요청이 온경우가 있을수 있으므로 3번의 잘못된 요청 처리를 확인한다.
그래서 public ResponseEntity<Article>... ResponseEntity에 <Article> 데이터가 담겨서 JSON으로 반환이 된다.
5. 해당 코드에 대한 문제점 발생
전체 필드 값이 아닌 일부의 필드값만을 PATCH로 호출하면 title 필드가 null 값이 반환되는 문제가 있다.
id가 1번인 필드의 Title값은 그대로 있고 content만 업데이트 되도록 구현을 해보면 아래와 같다.
Article target = articleRepository.findById(id).orElse(null); → DB에서 조회한 바꿀 대상 target을 .patch 붙여준다 무엇으로? 우리가 받아온 article 엔티티 값으로.( Article article = dto.toEntity(); ) 새롭게 있는것만 붙여 주도록 한다.
정상 적으로 동작한다는 가정하에 기존에 있는 새롭게 붙여진 놈을 save.(target);에 붙여넣고 save를 수행한다.
        target.patch(article);
        Article updated = articleRepository.save(target);
        return ResponseEntity.status(HttpStatus.OK).body(updated);
그리고 아래의 코드와 같이 해당 patch 메소드를 article 엔티티에 추가한다.
entity 패키지 폴더의 Article 파일의 내용은 아래와 같다.
article의 title이 있다면 this.title에 article의 타이틀을 넣어주면 된다.
마찬가지로 article의 content가 null이 아니면, 즉 있다면 this.content에 article.content를 넣어주면 된다.
    public void patch(Article article) {
        if (article.title != null)
            this.title = article.title;
        if (article.content != null)
            this.content = article.content;
    }
{
"id" : 1,
//title을 빼고 보냄
"content" : "@@@@@@@@@"
}위의 코드처럼 title 필드의 값을 빼고 보내도 누락된 필드값의 데이터는 그대로 있고, 입력한 필드의 값만 업데이트 되는것을 볼 수 있다.
    // PATCH
    @PatchMapping("/api/articles/{id}")
    public ResponseEntity<Article> update(@PathVariable Long id, @RequestBody ArticleForm dto) {

        // 1. 수정용 엔티티를 생성
        Article article = dto.toEntity();
        log.info("id: {}", "article: {}", id, article.toString());

        // 2. 대상 엔티티를 조회
        Article target = articleRepository.findById(id).orElse(null);

        // 3. 잘못된 요청 처리(대상이 없거나, id가 다른 경우)
        if (target == null || id != article.getId()) {
            // 400, 잘못된 요청 응답!
            log.info("잘못된 요청! id: {}, article: {}", id, article.toString());
            return ResponseEntity.status(HttpStatus.BAD_REQUEST).body(null);
        }

        // 4. 업데이트 및 정상 응답(200)
        target.patch(article);
        Article updated = articleRepository.save(target);
        return ResponseEntity.status(HttpStatus.OK).body(updated);
    }
PATCH(수정) 요청 처리
Talend API 사이트 에서 아래와 같이 요청을 한다.
요청 URL : http://localhost:8080/api/articles/1
{
  "id" : "1",
    "title" : "aaaaaa",
    "content" : "bbbbbbb"
}
결과값 확인

정상적으로 처리된것 확인
실제 게시판의 Title 값이 변경 된것을 확인
DELETE (삭제) 요청 처리
@DeleteMapping("/api/articles/{id}") 을 추가하여 DELETE 요청을 처리한다.
삭제 URL 요청 : localhost:8080/api/articles/1...2...3 이런식으로 요청을 수행한다.
1. 삭제 대상 찾기
Article target = articleRepository.findById(id).orElse(null); → 레파지토리에서 findById(id)를 통해 삭제 대상을 찾고, 대상 값이 없다면 null로 처리한다.
2. 잘못된 요청 처리
대상 target값이 없는경우 아래와 같이 처리한다.
리턴 값이 return ResponseEntity.status(...) 이므로 리턴 타입도 ResponseEntity<Article> 타입으로 변경 한다.
if (target == null) {
return ResponseEntity.status(HttpStatus.BAD_REQUEST).body(null);
}
3. 잘못된 요청이 아닌경우 대상을 삭제 한다.
articleRepository.delete(target); → articleRepository를 통해서 delete를 수행하는데 그 대상이 target 이다.
마지막으로 return ResponseEntity.status(HttpStatus.OK).build(); → 응답을 해주면 되는데 ResponseEntity.status(HttpStatus.OK) ResponseEntity 엔티티를 통해서 응답값을 OK로 실어서 보내주면 좋다. body를 null로 줘도 되고 build로 줘도 된다.
@DeleteMapping("/api/articles/{id}")
    public ResponseEntity<Article> delete(@PathVariable Long id) {
        // 대상 찾기
        Article target = articleRepository.findById(id).orElse(null);

        // 잘못된 요청 처리
        if (target == null) {
            return ResponseEntity.status(HttpStatus.BAD_REQUEST).body(null);
        }

        // 대상 삭제
        articleRepository.delete(target);
        return ResponseEntity.status(HttpStatus.OK).build();
    }
전체 코드
@Slf4j
@RestController //RestAPI용 컨트롤러, 데이터(JSON)를 반환한다.
public class ArticleApiController {
    @Autowired // DI(디펜던시 인젝션) : 외부에서 가져온다
    private ArticleRepository articleRepository;

    // GET, 전체 조회 코드
    @GetMapping("/api/articles")
    public List<Article> index() {
        return articleRepository.findAll();
    }
	// 단일 조회 코드
    @GetMapping("/api/articles/{id}")
    public Article index(@PathVariable Long id) {
        return articleRepository.findById(id).orElse(null);
    }

    // POST
    @PostMapping("/api/articles")
    public Article create(@RequestBody ArticleForm dto) {
        Article article = dto.toEntity();
        return articleRepository.save(article);
    }

    // PATCH
    @PatchMapping("/api/articles/{id}")
    public ResponseEntity<Article> update(@PathVariable Long id, @RequestBody ArticleForm dto) {

        // 1. 수정용 엔티티를 생성
        Article article = dto.toEntity();
        log.info("id: {}", "article: {}", id, article.toString());

        // 2. 대상 엔티티를 조회
        Article target = articleRepository.findById(id).orElse(null);

        // 3. 잘못된 요청 처리(대상이 없거나, id가 다른 경우)
        if (target == null || id != article.getId()) {
            // 400, 잘못된 요청 응답!
            log.info("잘못된 요청! id: {}, article: {}", id, article.toString());
            return ResponseEntity.status(HttpStatus.BAD_REQUEST).body(null);
        }

        // 4. 업데이트 및 정상 응답(200)
        target.patch(article);
        Article updated = articleRepository.save(target);
        return ResponseEntity.status(HttpStatus.OK).body(updated);
    }

    // DELETE
    @DeleteMapping("/api/articles/{id}")
    public ResponseEntity<Article> delete(@PathVariable Long id) {
        // 대상 찾기
        Article target = articleRepository.findById(id).orElse(null);

        // 잘못된 요청 처리
        if (target == null) {
            return ResponseEntity.status(HttpStatus.BAD_REQUEST).body(null);
        }

        // 대상 삭제
        articleRepository.delete(target);
        return ResponseEntity.status(HttpStatus.OK).build();
    }
}'⭐ SpringBoot > 𝄜 게시판 with SpringBoot' 카테고리의 다른 글
| 20. 테스트 TDD (0) | 2022.04.06 |
|---|---|
| 19. Service 계층과 Transaction (0) | 2022.04.05 |
| 17. RestAPI & JSON (0) | 2022.04.04 |
| 16. CRUD와 SQL 쿼리 (0) | 2022.04.04 |
| 15. 데이터 삭제 하기 (0) | 2022.04.04 |


